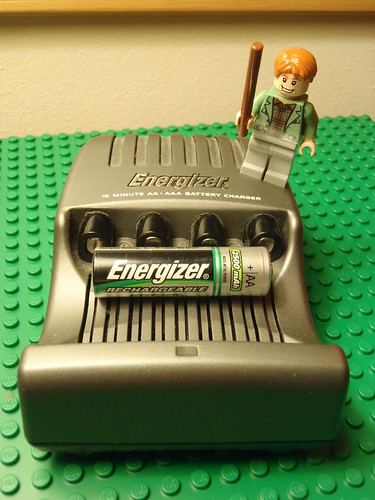
Car Battery Trickle Charger
You want to store your car, or RV, but you know that when you go to start your vehicle after it's been sitting for a few weeks or months, that your battery will be dead.
Car Battery Trickle Charger
Car Battery Trickle Charger
Car Battery Trickle Charger
Car Battery Trickle Charger
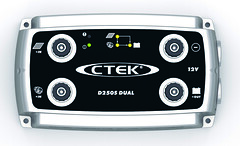
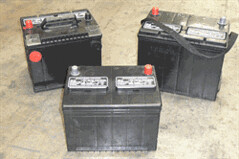
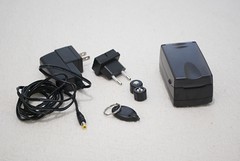
The car battery trickle charger is specifically designed for the maintenance of 12 Volt batteries that are used periodically or kept in storage for extended periods.
The normal self-discharge of a battery is prevented when using a car battery trickle charger. In addition, the life of rechargeable 12 volt batteries is extended by providing a minimum current, regulated output.
Low quality chargers will produce a strong, rapid charge that often will decay electrodes and boil out liquids. We strongly recomMend purchasing a charger that; once your battery has been fully charged, it will automatically shut-off and then resume charging as your battery level drops. Also, check to make sure the charger you buy is specifically designed for longterm use. You want to be able to safely leave it connected to your battery for days, weeks, months, even years!
More important tips for vehicle storage:
Gas up
Air carries moisture with it and that will result in condensation in the tank. To reduce this as much as possible make sure the tank is as full as it can be. This will reduce the condensation and considerably lessen the amount of water in the gas and the injection system. Get a gasoline stabilizer such as Stabil and put this in before filling the tank. You will need to run the engine for a while to ensure that the stabilized gas has penetrated the enTire injection system.
Change the oil Filter and the oil
The contaminants in old oil will corrode the insides of your engine so it's important to put fresh oil and a new Filter in the car.
Over-inflate Tires
Inflate automobile tire to approximately 40 or 45 psi. Modern radial tires aren't known to have problems with flat spotting from storage. Still, some people suggest that you roll the car a little every 2 weeks or so. It is strongly recomMended that you don't jack the vehicle up and rotate the tires because when you lower the car the suspension will be loaded up. Try and check the pressure of the tires every few weeks or so and Watch for slow leaks.
Some say that the suspension will sag by putting the car up on jacks. Letting it sit on the ground for the few months shouldn't lead to any problems.
Clean the vehicles interior
When it comes time to take your vehicle out of storage you won't clean it. You may not want to clean it before you put it in storage but when you take it out you simply won't do it. So, take some time and get everything really clean. Clean the carpets. Clean the glass, inside and out. Clean behind the pedal cluster. Clean and condition the leather. You'll be surprised at the dirt you'll find. Clean all the nooks and crannies. Also, don't forget to also clean the trunk, etc. There is a full season of dirt and junk in the vehicle that you're not going to want to carry into the next season. Moth balls and a bag or two of the silica gel inside the car (which absorbs any moisture in the Air) are excellent preventative measures.
Wash the vehicle
Dust and dirt are corrosive to any paint Job so to ensure a longer life it's important when storing to not leave those eleMents on the vehicle, but take care not to put it away wet. This can be challenging if you want to use the vehicle right up to wet or Snow season. You should never put your car away wet because rust will form everywhere the water collects. You'll want to try anticipating the weather and cleaning the car and driving it a little to dry it out before storage. Then it will be necessary to get the dust off before storing it with a wipe down with wet/damp towels followed drying it with towels. Another option is one of the "quick detailer sprays" available at many auto parts stores.
Wax car
This is recommended but it may be difficult to get in a good waxing of the car depending on the temperature when you are preparing to store it. A good quality of wax will be too difficult to apply in low temperatures.
Condition the rubber parts
Many of the brand name products for treating rubber put on greasy coatings of silicon (Silicon isn't good for paint) or tend to build up over time and actually make the trim look worse. Use a good rubber conditioner to preserve all the trim.
Clean the wheels
Brake dust is highly corrosive and it's not good to have it sitting on your wheels for weeks or months at a time. To do the most thorough Job remove the wheels from the car, clean them on the outside and inside.
Cover Openings
Sealing up the exhaust tips will help to prevent rust inside the exhaust system. Close the heater vents and any other openings. Every 2 weeks or so, it's probably a good idea to make a periodic inspection. Check if any leaks developed or if any mice are nesting.
Engine Storage
Spray WD 40 into cylinders
Take out spark Plugs
Spray WD 40 into Air intakes
Turn over the engine by hand with wrench a couple of times
Every three months repeat this (except the spark Plugs which will no longer be in the engine)
To change the wheel bearing position, every three months turn wheels, or move car into different location
And for manual transmissions shift into one gear and move gear box internal around
Every six months drive the vehicle.
Starting the vehicle
There are differing views on whether starting a vehicle periodically while it is in storage is a good idea. Starting the engine puts considerable thermal stress on parts which are often in cold temperatures. The majority of engine wear occurs in the first few minutes when a car has been started because the oil is still in the oil pan and not lubricating the engine. In cold weather the engine may not get hot enough to burn off the moisture, acids, etc. the car is creating while running. This contaminates the clean oil. If you are going to store your car for a really long time then it needs to be run periodically to keep it operable.
Car Battery Trickle Charger